

How To Stop Iis On Windows 7
This browser is no longer supported.
Upgrade to Microsoft Edge to take advantage of the latest features, security updates, and technical back up.
Installing IIS 7 on Windows Vista and Windows seven
by IIS Team
Introduction
Advances in cloud technologies have led many users to use Windows Azure Spider web Sites to host both a product site and test site, as it makes information technology easy to test various configurations without impacting their own personal computers. If you still prefer to do this on your desktop, you tin can install IIS on it, as well as other applications and extensions easily using the Microsoft® Web Platform Installer (Web PI). To learn more about the Web PI, encounter Learn about and install the Web PI.
If you lot cull to install IIS 7.0 or to a higher place manually, you can use this article for guidance.
Before You Begin
Ensure that you have installed 1 of the editions of Windows Vista or Windows 7 on which IIS 7 and in a higher place is supported before you continue. Non all IIS features are supported on all editions of Windows Vista and Windows 7. Home Bones and Starter editions include only limited bones features of IIS. To see a list of which features are supported on the edition of Windows yous are using, encounter one of the following:
- Available Role Services in IIS 7.0 (Windows Vista)
- Bachelor Web Server (IIS) Role Services in IIS vii.5 (Windows seven)
As well be certain that you have administrative user rights on the computer. Past default, you do not have administrative user rights if you are logged on as a user other than the congenital-in administrator, even if you were added to the local Administrators group on the estimator (this is a new security feature in Windows Server® 2008 chosen Local User Administrator). Log on either to the congenital-in administrator account, or explicitly invoke applications as the built-in administrator past using the runas command-line tool.
Note that you lot tin can run runas /user:ambassador cmd.exe then that every awarding yous run from that command line will be elevated, eliminating the need to employ the runas syntax from that command line.
If you are logged on to an business relationship other than the built-in local ambassador account, you may see the following security alert dialog box.
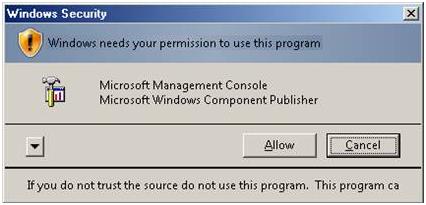
Figure i: Windows Security (User Account Command)
Install IIS 7 or Above
-
To open the Windows Features dialog box, click Offset, and then click Command Panel.

Figure ii: Windows Vista Start carte
-
In the Control Console, click Programs.
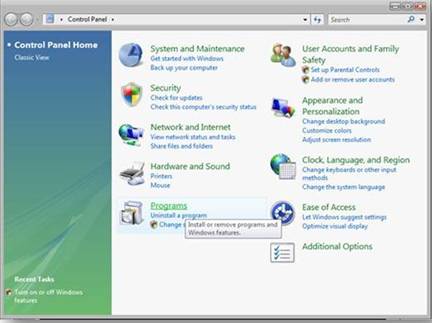
Figure 3: Control Panel Home
-
Click Plough Windows features on or off.

Figure 4: Command Console install options
-
Y'all may receive the Windows Security alarm. Click Let to continue. The Windows Features dialog box is displayed.
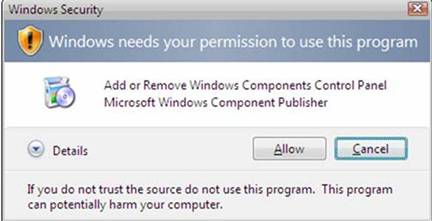
Effigy 5: Windows Security dialog box
-
Expand Cyberspace Information Services.Additional categories of IIS features are displayed. Select Cyberspace Information Services to choose the default features for installation.

Figure 6: Windows Features dialog box - IIS
-
Expand the additional categories displayed, and select whatever additional features you want to install, such as Web Direction Tools.
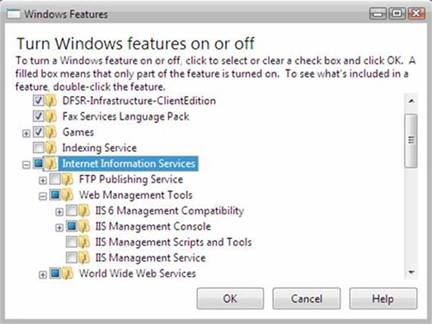
Figure vii: Windows Features dialog box - IIS characteristic selection
-
If you are installing IIS for evaluation purposes, y'all may want to select additional features to install. Select the check boxes for all IIS features you want to install, and then click OK to showtime installation.

Figure 8: Windows Features dialog box - Installation option
-
The progress indicator appears.
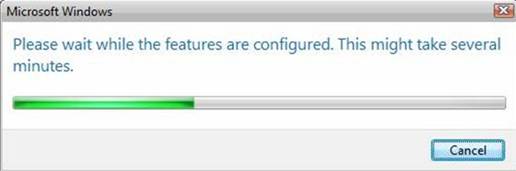
Effigy ix: Progress indicator
-
When the installation completes, the Windows Features dialog box closes, and the Command Panel is displayed.
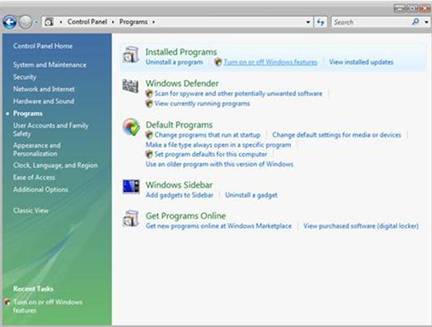
Effigy ten: Control Console Home page
-
IIS is at present installed with a default configuration on Windows Vista or Windows seven. To confirm that the installation succeeded, type the following URL into your browser, http://localhost.

Effigy 11: Default Web site
-
Next, you tin can apply Cyberspace Information Services Manager to manage and configure IIS. To open IIS Manager, click Start, type inetmgr in the Search Programs and Files box, and so press ENTER.

Figure 12: Default Spider web Site Abode page
If you want to use ASP, Microsoft® ASP.NET, or PHP, install the modules needed to host these pages; this can exist done during the installation of IIS or afterwards the installation is complete.
Use Unattended Setup to Install IIS 7.0 and above
IIS can also exist installed unattended on Windows Vista. For detailed instructions and scripts, see Using Unattended Setup to Install IIS 7.0 and Above.
Links for More Information
IIS 7 Installation and Deployment
How to install ASP.Cyberspace one.1 with IIS7 and Abobe on Vista and Windows 2008.
Installing IIS vii on Vista.
Source: https://docs.microsoft.com/en-us/iis/install/installing-iis-7/installing-iis-on-windows-vista-and-windows-7
Posted by: maxwellancons38.blogspot.com
0 Response to "How To Stop Iis On Windows 7"
Post a Comment